Introduction
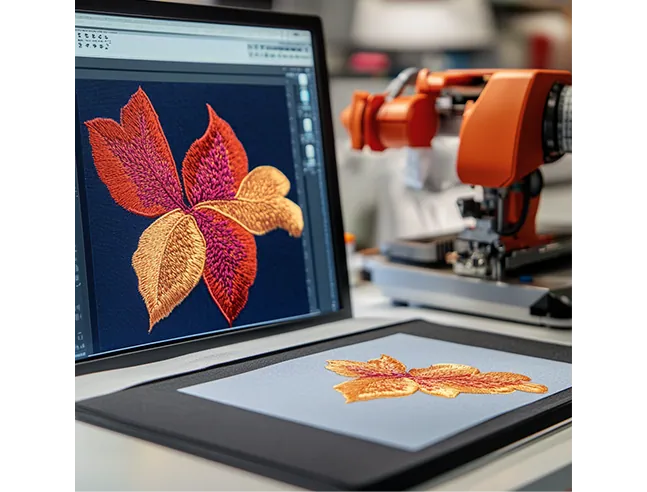
Your business logo represents your brand identity, and having it beautifully embroidered on uniforms, hats, or promotional items creates a polished, professional image. But to convert your business logo to embroidery perfectly requires more than just uploading a file to your machine - it demands careful preparation and specialized techniques.
In this guide, we'll walk through the entire process to convert your business logo to embroidery-ready artwork. You'll learn professional methods to maintain your brand's integrity in thread form, whether you're doing it yourself or working with an embroidery service. We'll cover everything from file preparation to stitch selection to help you convert your business logo to embroidery flawlessly.
Why Embroider Your Business Logo?
Before we dive into the how, let's look at why embroidered logos make such an impact:
-
Creates premium brand perception
-
Lasts longer than printed alternatives
-
Projects professionalism on uniforms
-
Works on various fabrics and products
-
Maintains crisp appearance after repeated washing
Preparing Your Digital Logo for Embroidery
Start With the Right File Format
The best starting points for conversion:
-
Vector files (AI, EPS, SVG) - Ideal for clean conversion
-
High-resolution PNG - Good if vectors aren't available
-
PDF with vector elements - Can work if properly exported
Files to avoid:
-
Low-resolution JPGs
-
Watermarked images
-
Screenshots from websites
Simplify Your Logo Design
Embroidery works best with:
-
Clean, bold lines
-
Limited color palette (6 colors max)
-
Defined shapes rather than gradients
-
Minimal small text (under ¼" tall rarely stitches well)
If your logo has complex elements, consider creating an embroidery-specific simplified version. Many brands maintain two logo variants for this purpose.
Conversion Methods Compared
Professional Digitizing Services
Best for:
-
Companies without in-house expertise
-
Complex logo designs
-
Bulk orders
Cost: $15-$75 per logo
Turnaround: 1-3 business days typically
Top Services:
-
The Digitizing
-
Absolute Digitizing
-
Logo Digitizing
DIY Software Conversion
Best for:
-
Simple logo designs
-
Businesses wanting control
-
Frequent small-batch needs
Software Options:
Automatic Conversion Tools
-
Hatch Embroidery Auto-Digitize ($999)
-
Embrilliance StitchArtist ($129-$399)
-
SewArt ($75)
Professional Manual Digitizing Software
-
Wilcom EmbroideryStudio ($3,000+)
-
Pulse Ambassador ($1,500+)
Hybrid Approach
Many professionals combine:
-
Auto-digitizing for base conversion
-
Manual tweaking for perfect results
-
Multiple test stitches
Step-by-Step Conversion Process
1. Clean Up Your Artwork
Before converting:
-
Remove any background elements
-
Simplify color gradients
-
Thicken thin lines (minimum 1mm)
-
Enlarge small text or remove if too tiny
2. Choose Your Stitch Types
Professional digitizers use:
-
Satin stitches for text and borders
-
Fill stitches for large solid areas
-
Running stitches for fine details
3. Set Proper Stitch Direction
Critical for professional results:
-
Follow natural contours of shapes
-
Alternate directions for adjacent elements
-
Consistent angles for uniform appearance
4. Add Underlay Stitches
Essential for:
-
Stabilizing fabric
-
Preventing puckering
-
Creating smooth surfaces
Common underlay types:
-
Edge run
-
Zigzag
-
Center run
5. Adjust Stitch Density
Find the sweet spot:
-
Too dense = stiff fabric
-
Too sparse = visible gaps
-
Typical range: 0.35mm-0.55mm
6. Test and Refine
Never skip these steps:
-
Stitch on scrap fabric
-
Check for thread breaks
-
Verify color accuracy
-
Examine stitch registration
-
Make adjustments as needed
Choosing the Right Materials
Fabric Considerations
Best results come from matching your logo to:
-
Polo shirts: 50/50 cotton-poly blend
-
Hats: Structured cotton twill
-
Jackets: Nylon or polyester
-
Tote bags: Canvas or duck cloth
Thread Selection
Professional recommendations:
-
Polyester thread - Most durable for frequent washing
-
Rayon thread - Beautiful sheen but less durable
-
Metallic thread - For special accents only
Stabilizers Matter
Choose based on fabric:
-
Cutaway - For stretchy fabrics
-
Tearaway - Woven, non-stretch materials
-
Water-soluble - Specialty fabrics like towels
Common Logo Conversion Mistakes
Design Errors
-
Too many small details
-
Overly complex color blends
-
Text that's too tiny
Technical Mistakes
-
Skipping underlay stitches
-
Incorrect stitch density
-
Poor stitch sequencing
Production Oversights
-
Not testing on actual garments
-
Using wrong stabilizer
-
Ignoring fabric characteristics
Cost Breakdown
DIY Approach
-
Software: $75-$3,000
-
Test materials: $20-$50
-
Time investment: 3-10 hours learning
Professional Service
-
Digitizing: $15-$75
-
Sample stitch-out: $10-$30
-
Bulk production: $2-$15 per item
Maintaining Brand Consistency
Create an embroidery style guide that specifies:
-
Exact thread colors (Pantone matches)
-
Minimum reproduction sizes
-
Approved fabric backgrounds
-
Stitch type preferences
-
Placement guidelines
Conclusion
Converting your business logo to embroidery opens new opportunities for professional branding across uniforms, promotional items, and retail products. While the process requires attention to detail, the results deliver unmatched longevity and premium quality compared to printed alternatives.
Remember these key takeaways:
-
Start with the cleanest possible digital file
-
Simplify complex elements for better stitching
-
Always test before full production
-
Consider professional help for important projects
Your logo represents your business - make sure it looks its best in every format. With these techniques, you're ready to transform your digital branding into stitch-perfect reality.


