Moisture Barrier Estimating
Let’s be honest—moisture barriers don’t get the spotlight in construction projects. They’re hidden behind walls, under slabs, and beneath roofing systems. But don’t let their invisibility fool you. These unsung heroes play a critical role in protecting the building from water damage, mold, and costly repairs.
For estimators, moisture barriers might seem like a small line item, but missing or underestimating them can lead to big consequences. Whether it’s a vapor barrier under a concrete slab or a weather-resistant barrier behind exterior siding, you need to know where, how much, and what type of barrier is needed.
If you’re new to estimating or just brushing up, this guide will walk you through the essentials of moisture barrier estimating with a step-by-step approach, practical tips, and a little motivation to keep you going.
Let’s jump in—because good estimators know how to keep the water out!
Step-by-Step Guide to Moisture Barrier Estimating
Step 1: Understand the Types of Moisture Barriers
First things first—you can’t estimate what you don’t understand. Moisture barriers come in a variety of forms, each with its own purpose. Here are the main types you’ll come across:
· Vapor barriers (or vapor retarders): Typically installed under concrete slabs to prevent moisture migration from the ground.
· Air barriers: Prevent airflow and moisture infiltration through the building envelope.
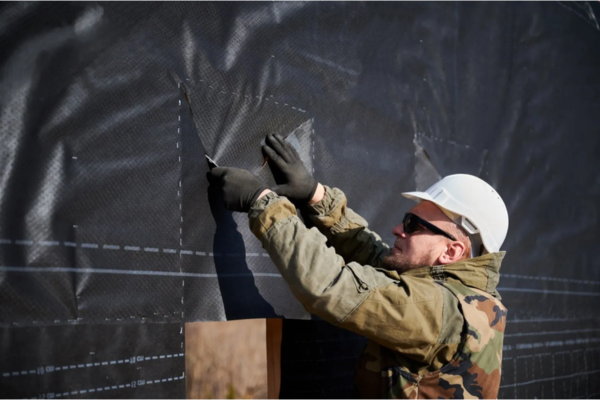
· Weather-resistant barriers (WRB): Installed behind siding or cladding to protect walls from wind-driven rain.
· Roofing underlayments: Placed beneath shingles or other roofing systems to protect from leaks.
📌 Pro Tip: Always refer to the project specifications (Division 07 - Thermal and Moisture Protection) to confirm the exact type and product required.
Step 2: Identify Where Moisture Barriers Are Required
Next, carefully review the architectural and structural drawings to locate every area that requires a moisture barrier. Look in the following places:
· Under slabs on grade
· Behind exterior cladding (e.g., house wrap or building paper)
· Roof systems (underlayments, ice & water shield)
· Foundation walls and waterproofing
· Basement wall systems
Use finish schedules, wall types, and section details to understand what is being used and where. The details are often in the fine print or on a separate waterproofing sheet.
📌 Pro Tip: If you can’t find it on the plans, check the specs. And if it's still unclear, ask the question early—never assume.
Step 3: Measure Quantities Accurately
Once you've identified where barriers go, it's time to measure.
· Slab vapor barrier: Measure the slab-on-grade area and include extra for overlap (usually 6"–12") and vertical extensions up the stem wall.
· WRBs on walls: Measure the exterior wall surface area and include all sides. Deduct large windows and doors unless the specs say otherwise.
· Roof underlayment: Calculate the roof surface area, being sure to account for pitch (use the slope factor).
· Foundation waterproofing: Measure the exterior foundation wall height and length, then multiply for square footage.
Use a takeoff tool or manual measurement and always round up slightly to account for waste, overlap, and installation complexity.
📌 Pro Tip: Add a waste factor of 5–10%, depending on the barrier type and installation method. Overlaps and field conditions can eat up more material than you think.
Step 4: Apply Labor and Material Costs
Now that you have quantities, it’s time to build your estimate. For each moisture barrier, you’ll need to account for both material and labor costs. While actual pricing will vary based on region, supplier, and product type, here are some typical ranges you might expect:
· Slab vapor barriers generally cost between $0.40 and $0.80 per square foot, including both material and labor.
· WRBs (like house wrap) might range from $0.60 to $1.20 per square foot, depending on whether it's mechanically fastened or self-adhering.
· Roof underlayments can cost anywhere from $0.90 to $2.00 per square foot, especially if using high-performance or ice-and-water shield products.
· Foundation waterproofing systems, particularly those with drainage mats or peel-and-stick membranes, can range from $3.00 to $6.00 or more per square foot.
In addition to those base costs, be sure to include:
· Accessories (tapes, sealants, fasteners)
· Special tools or equipment (such as scaffolding or lifts)
· Subcontractor markup if you’re pricing this out from a trade partner
📌 Pro Tip: Always double-check labor productivity. Applying barriers to a high, narrow wall takes longer than a wide, accessible one. Adjust your rates accordingly.
Step 5: Check for Overlaps and Coordination
One of the biggest pitfalls in estimating moisture barriers is missing overlaps with other trades. Don’t assume it’s “someone else’s scope.”
Ask yourself:
· Who installs the barrier—concrete crew, framing, roofing, or waterproofing sub?
· Are there transitions from horizontal to vertical surfaces?
· Are there penetrations that require detailing (e.g., pipes, vents)?
Include time and material for:
· Sealing around penetrations
· Wrapping corners and window openings
· Detailing complex transitions
📌 Pro Tip: Clearly define what’s in your scope in the proposal notes. Clarify assumptions and exclusions—this protects you in case of scope gaps.
Practical Tips for Success
1. Use real-world feedback. Talk to installers or subs to understand what slows them down or creates extra costs.
2. Watch for climate-specific requirements. Some regions require higher-grade vapor barriers or specific fire-rated WRBs.
3. Keep a unit cost library. Start building a simple spreadsheet with updated pricing for common barriers and accessories.
4. Highlight your assumptions. Especially if drawings are unclear, spell out what you’ve included and why.
5. Double-check elevations. You might catch an extra 3 feet of barrier on a foundation wall or a parapet that wasn’t obvious.
Conclusion:
Estimating moisture barriers might not feel as exciting as steel or concrete, but it’s one of the most important parts of the building envelope. A missed barrier or incorrect material can lead to leaks, mold, callbacks, and unhappy clients.
But you? You’re the kind of estimator who takes pride in the details.
You now have the tools to confidently estimate moisture barriers:
· You know the types and where to find them
· You can measure accurately and apply the right costs
· You understand how to catch the little details that others might miss